BDP short tutorial
Block diagrams consist mainly of blocks connected by lines, hence mainly two BDP objects will be used for drawing called block and path. All drawing objects in BDP are called templates. Templates carry descriptions of diagram components in form of many attributes which can be accessed, modified or added as a regular Python object attributes. New templates can be derived from the existing ones by calling them with a list of attributes that are be changed. Finally, the templates can be rendered to the diagram by passing them to the fig object.
All examples shown in this tutorial can be found in the bdp/doc/source/images folder of the bdp source code.
A simple block
The following examples shows how to render a simple block with the text using BDP.
from bdp import *

# New template called a_template derived from block with text_t attribute set
a_template = block(text_t='A Block')
# Set the color attribute
a_template.color = 'red'

# Render a_template
fig << a_template
Resulting in:
The block and templates derived from it, render to two node TikZ elements, one for the shape and the other for the text. Many block template attributes are rendered directly to the options list of a TikZ node with the following convention:
| node option form | Corresponding BDP template setting | Description |
|---|---|---|
| option=value | template.option = value | Set the desired value to the template attribute with the same name as the desired node option |
| option | template.option = True | Set value of the template attribute of the same name as the desired node option to the boolean True. To unset the option, set it to False. |
| option with spaces | template.option_with_spaces | TikZ option with spaces correspond to the template attribute of the same name with spaces replaced by underscores ‘_’ |
Some template attributes, however do not translate directly to the TikZ equivalents, and some of them are inferred in certain situations. These attributes include:
| Attribute | TikZ equivalent option | Description |
|---|---|---|
| p | at (p[0], p[1]) | Determines the absolute position of the rendered node |
| size | minimum width=size[0], minimum height=size[1] | Determines the size of the rendered node |
| alignment | – | Determines the relative position of the text within a block |
| border | draw | Determines whether the block template border is drawn |
Template a_template is rendered to the following two TikZ elements by the rules given above:
\node at (20.71pt, 6.47pt) [draw,minimum width=41.42pt,minimum height=12.94pt,color=red,rectangle] {} ;
\node at (20.71pt, 6.47pt) [align=center,text width=35.42pt,minimum width=41.42pt,minimum height=12.94pt] {A Block} ;
Block relative position
Next example shows how BDP facilitates the relative positioning of the blocks in diagram.
from bdp import *
t1 = block('T1')
t2 = block('T2').below(t1)
t3 = block('T3').left(t2)
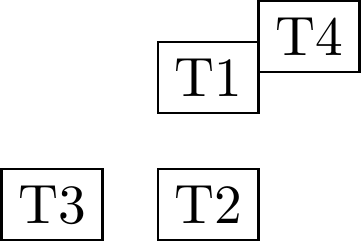
t4 = block('T4').align(t1.e(0.2), prev().w(1))
fig << t1 << t2 << t3 << t4
Resulting in:
There are several helper methods used to position the blocks relatively to one another in diagram. The methods over, right, left and below all have the same form:
template.method(other, pos=1)
These methods will position the template over, below, to the right or left of the passed other template. The nodesep attribute of the other template determines the spacing that should be made between the templates. The nodesep attribute value is multiplied by the passed pos argument.
The method align can be used to position two templates in such a way that their points (other and own) passed as arguments to this method, become overlapped:
template.align(other, own)
The point relative to the template can be specified using helper methods: e, n, s and w
| Method | Description |
|---|---|
| n | Coordinate system with origin in top-left point of the template, with x as primary coordinate |
| w | Coordinate system with origin in top-right point of the template, with y as primary coordinate |
| s | Coordinate system with origin in bottom-left point of the template, with x as primary coordinate |
| e | Coordinate system with origin in top-left point of the template, with y as primary coordinate |
When an int value is supplied to these methods as a parameter, the value will be interpreted as an absolute unit. However, when a float value is supplied, it will be interpreted as a fraction of template’s size. The following example shows how these methods can be used to determine the points relative to the template.
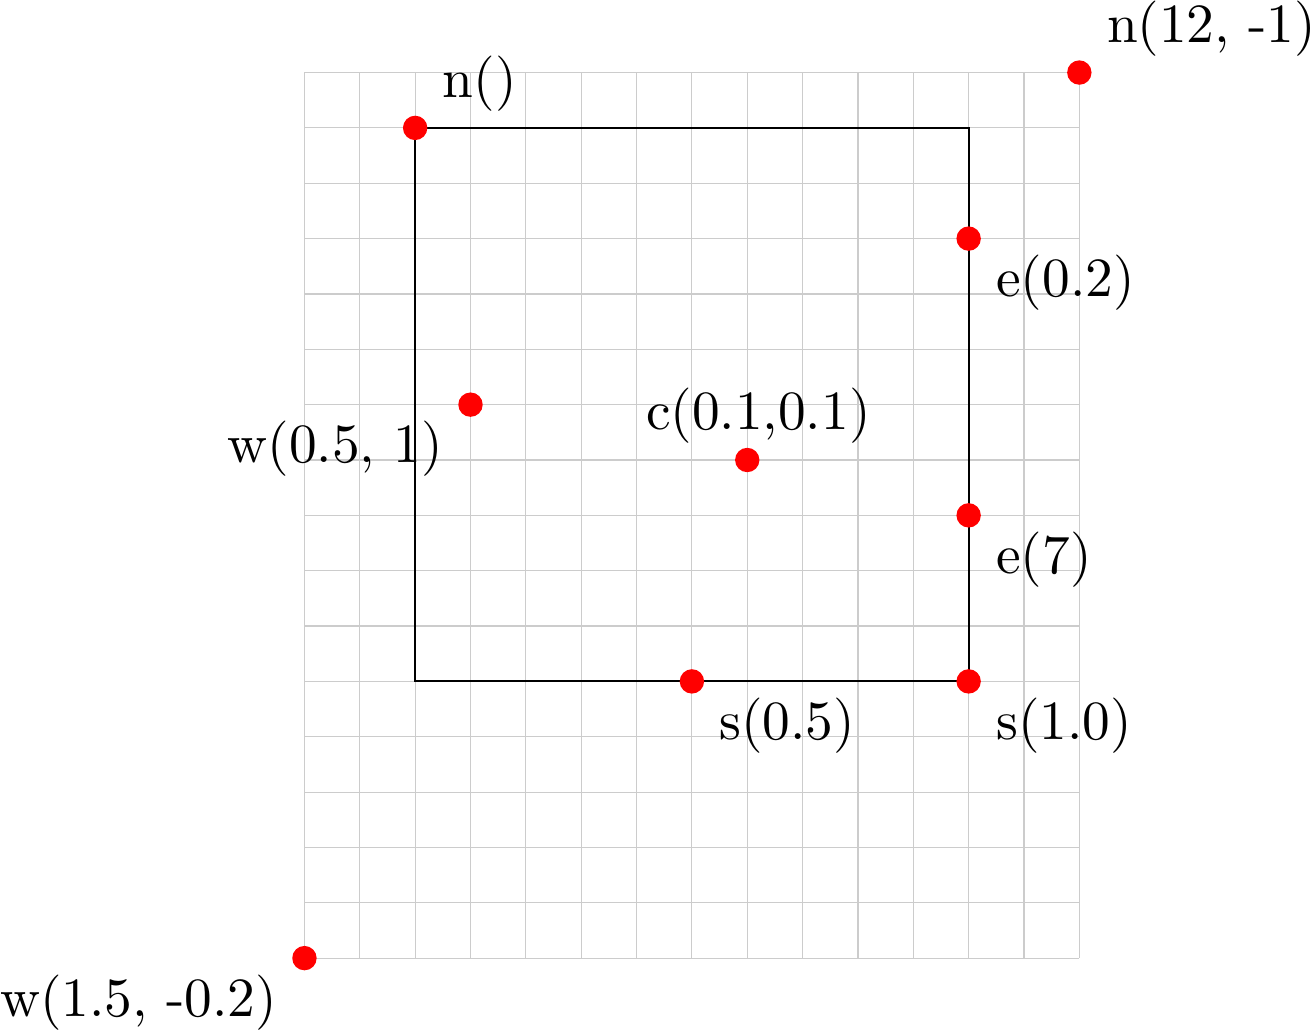
The function prev of the BDP package can be used to access the last template that has been derived in the script.
Text alignment within block
Text can be aligned within block using the alignment attribute. String of two characters are expected for the value of the alignment, the first one for the vertical and the second for the horizontal alignment. The following figure shows the available settings for the alignment attribute.
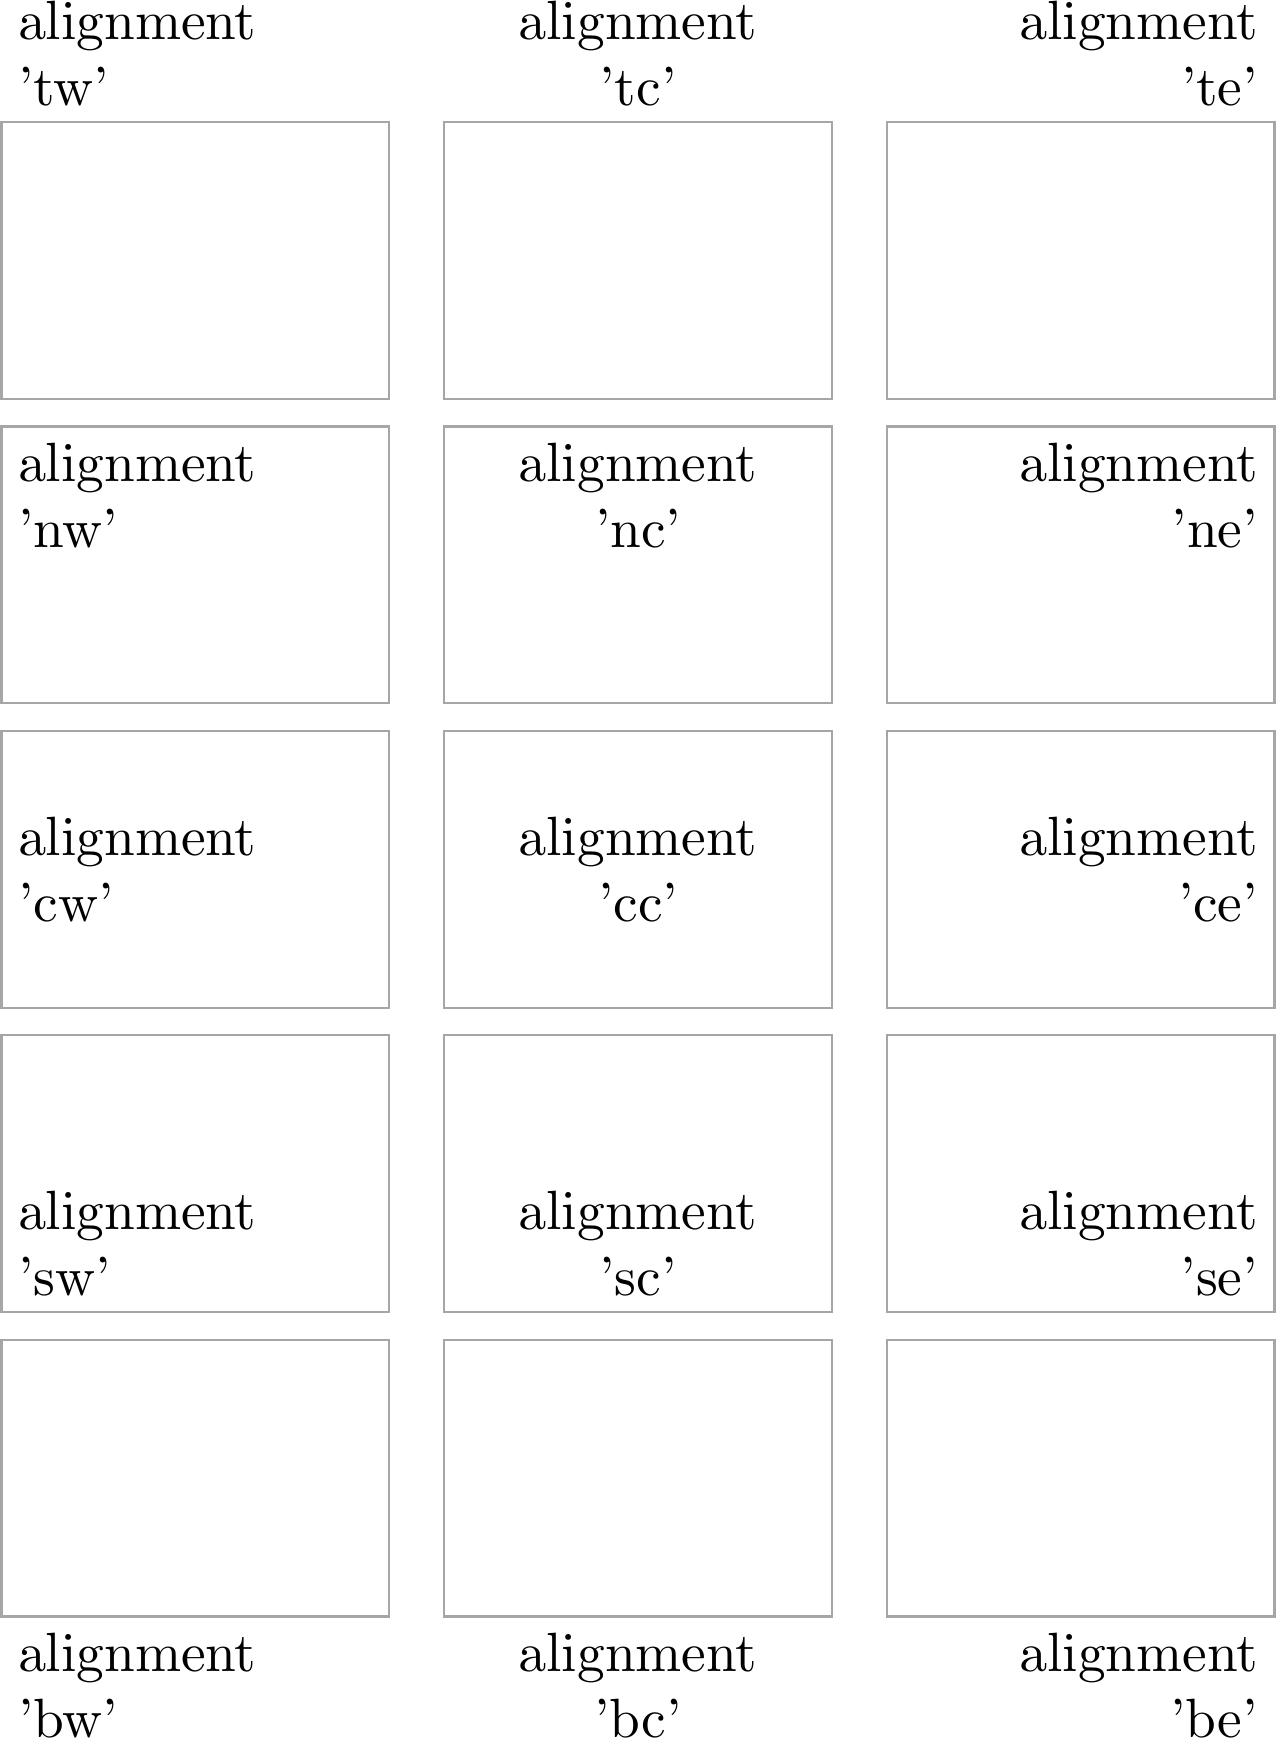
For the alignment setting, all combinations of the first and second character from the table below are valid.
| First character | Vertical text position | Second character | Horizontal text position |
|---|---|---|---|
| ‘t’ | Above the top edge | ‘w’ | Left aligned |
| ‘n’ | Below the top edge | ‘c’ | Center aligned |
| ‘c’ | Vertically centered | ‘e’ | Right aligned |
| ‘s’ | Above the bottom edge | ||
| ‘b’ | Below the bottom edge |
Settings text attributes
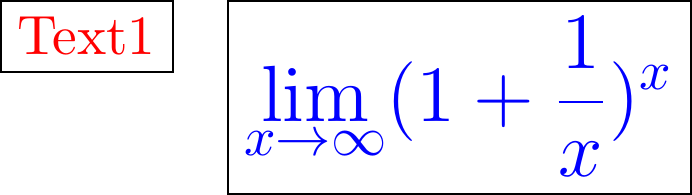
Text is an attribute of the block template and it is itself a template. Text attributes can be thus accessed as template.text.attr. Additionally as a shorthand, text attributes can be accessed as template.text_attr. The following example shows two ways of accessing text attributes.
from bdp import *

b1 = block('Text1', text_color='red')
b2 = block(r'$\displaystyle\lim_{x\to\infty} (1 + \frac{1}{x})^x$').right(b1)

b2.text_font = r'\Large'
b2.text.color = 'blue'

fig << b1 << b2
Resulting in:
The fig object
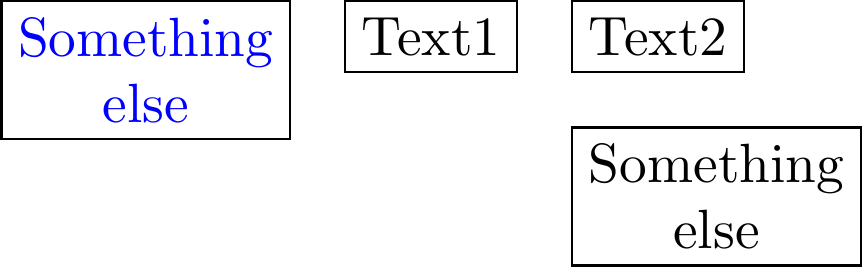
The fig object accepts the BDP templates via ‘<<’ operator and memorizes their TikZ renderings in order to form complete TikZ image. Additionally fig memorizes the template objects too, and can be used to reference them. The templates can be referenced via their text attribute, or via order in which they were rendered. Both are done via indexing operator. When referencing via template text, wildcards ‘*’ and ‘?’ can be used. The following example demonstrates the two ways.
from bdp import *

fig << block('Text1')
fig << block('Text2').right(fig['Te*'])
fig << block(r'Something \\ else').below(fig[-1])
fig << fig['S*'](text_color='blue').left(fig[0])
Resulting in:
When adding a new template to the fig object that has the same text as the one added before, the number will be added to the end of the new templates text to form its key in order to make it unique. The fig object has following attributes that can be used to customize the TikZ rendering:
| Attribute | Description |
|---|---|
| grid | Scale between the BDP units and points (pt) in TikZ |
| package | Python set containing package names that should be imported via usepackage statement |
| tikz_library | Python set containing tikz libraries that should be imported via usetikzlibrary statement |
| tikz_prolog | Latex statements between the begin{document} and begin{tikzpicture} |
| options | Global options for TikZ picture |
| tikz_epilog | Latex statements between the end{tikzpicture} and end{document} |
path template
The path template is used to render wires in BDP diagrams. The path template operates similarly to the block and text templates. The difference is that it behaves as a container for a list of points that constitute a path and a list of line routing options stored in route attribute.
from bdp import *

fig << path((0,0), (1,1), (2,2), route=['--', '-|'])
fig << path(fig[-1][0] + p(3,0), poff(1,1), poff(1,1), routedef='|-', style='<->', color='red')
Resulting in:
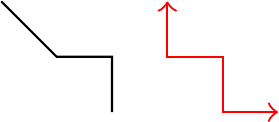
If route contains less items than there are point pairs, it is padded with value supplied to the routedef attribute.
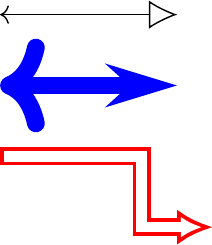
The path template can also use new arrays.meta library (TeX Live 2014 contains the library out of the box) via cap template.
from bdp import *

fig << path((0,0), (5,0), style=('<', cap(width=0.8, length=0.8, open=True)))
fig << path((0,2), (5,2), style=('<', cap(type='Stealth', width=1.2, length=2)), line_width=0.5, color='blue')
fig << path((0,4), (4,6), (6,6), routedef='-|', style=('', cap(width=1, length=1)), line_width=0.5, double=True, border_width=0.2, color='red')
Resulting in:
The group template
The group template behaves completely identical to the fig object when it comes to adding new templates to it and referencing them (they share a common superclass). Please refer to chapter The fig object. Furthermore block, shape and text templates have the same grouping functionality since they derive from group template, so this chapter applies to them as well. The group is a template and as such can be rendered. When a group is rendered to a fig, all its elements are rendered as well. When a group position is changed, the position of all its elements is shifted as well.
Important attribute of the group template is called group as well. When it is set to ‘tight’ (which is default for the group template), group size and position is recalculated whenever a new element is added in such a way that the group tightly encompass its all elements. When group attribute is set to None (which is default for*block*, shape and text templates), position and size of the group is independant of the size and position of its elements.
Resulting in:
